Some users encountered and reported a problem where the WhatsApp button, part of the OneClick Chat to Order plugin, wasn’t displaying on the WooCommerce Thank You page after the 8.1.0 update.
This is due to WooCommerce’s new security measure that escapes HTML output on this page.
Specifically, the change is in the order-received.php file within the /woocommerce/templates/checkout/ directory, where the line now reads:
echo esc_html($message);
Before this update, WooCommerce did not escape the $message variable, allowing for HTML elements like the WhatsApp button to be rendered on the Thank You page.
I first noticed this issue discussed on a support forum. While a fix has been made to revert this change, it won’t be available until the next WooCommerce release.
If you prefer waiting for the official update, you can temporarily disable the WhatsApp button feature on the Thank You page through the OneClick Chat to Order plugin settings, found under the Checkout tab.
If you need an immediate solution, there are two workarounds, though I recommend waiting for the update and disabling the feature for now.
Two Workaround Solutions for WhatsApp Button Not Showing on Thank You Page
To address the issue, you can:
- Directly edit the order-received.php file.
- Use a Child Theme: Copy and modify the order-received.php file in the Child Theme directory.
I’ll detail these methods next.
Either one you choose, please backup your website immediately before proceeding.
1. Directly edit the order-received.php file (Not Recommended)
This method is generally not recommended as it will trigger error on a live site if you do it wrong and any modifications made will be override by the next update.
But, since we are waiting for the next update anyway, we can choose this option as a quick workaround method.
1. Go to your dashboard and access the Plugins menu => Plugin File Editor => select WooCommerce from the dropdown menu.
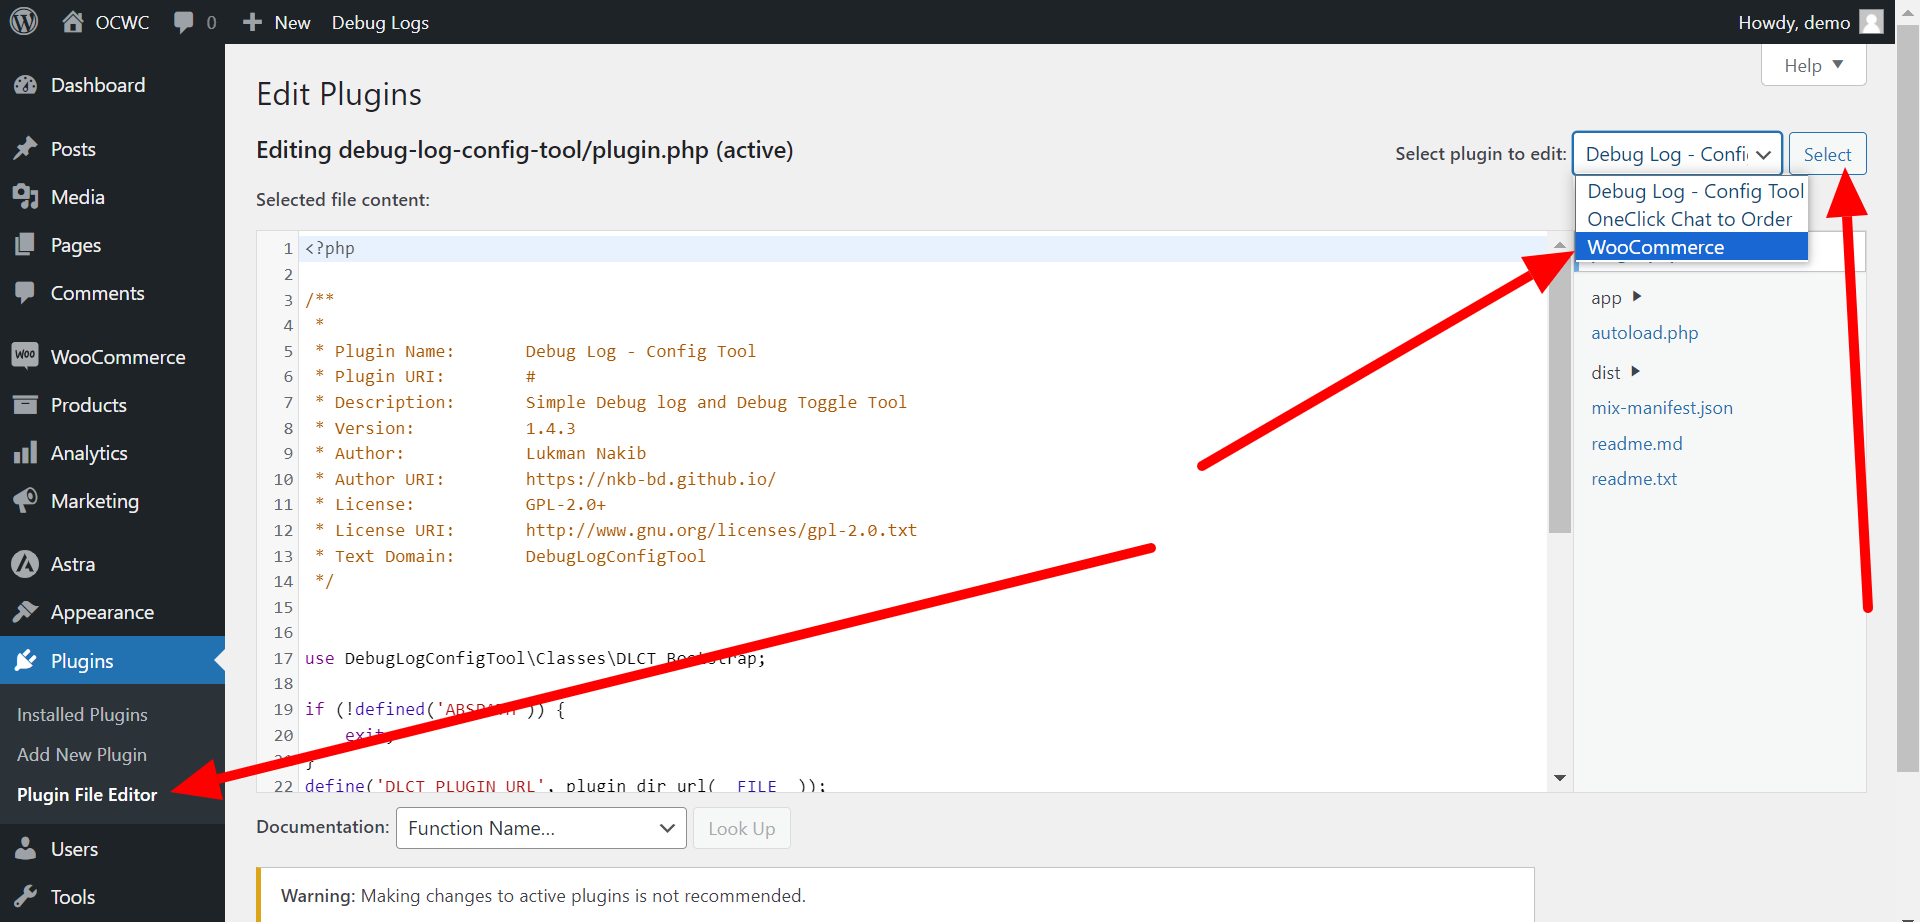
2. From the list of plugin files on the right, click templates then click checkout then click the order-received.php file.
Once you are inside the order-received.php file, just change the following line:
echo esc_html($message);
into
echo $message;
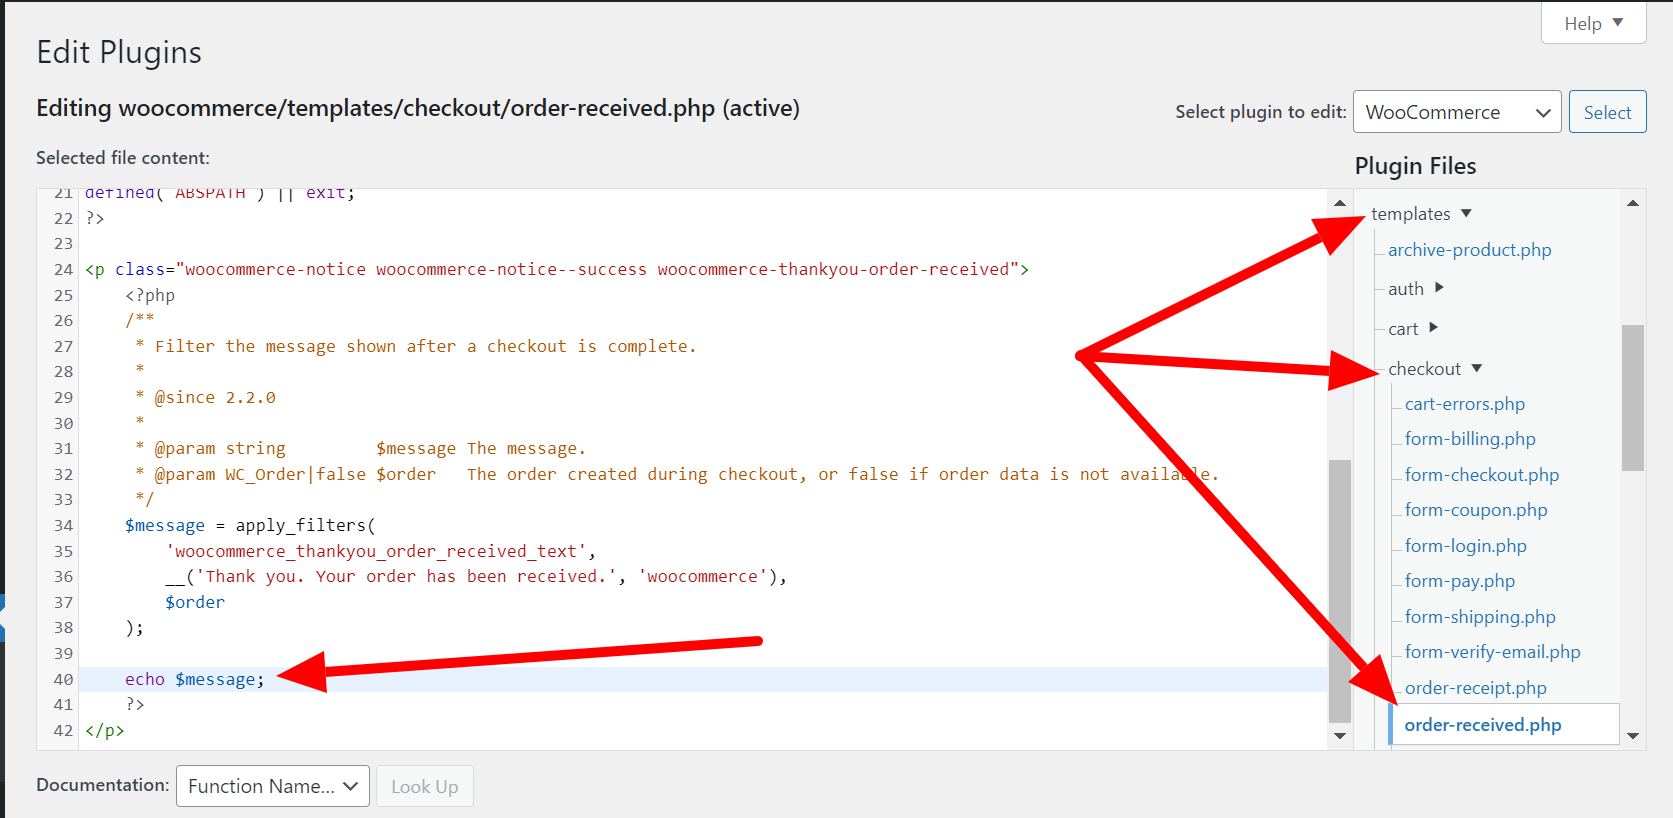
Important!
Before clicking the Save Changes button, please re-check the modifications you made, and ensure it’s correct.
2. Use a Child Theme (Recommended)
A WordPress Child Theme lets you to override, extend or customize some features available in a theme and plugins you are using without having to worry about on the next theme or plugin upgrade.
To fix the issue, you can create your own child theme using several methods below:
- Using a WordPress plugin
- Using the free online WordPress Child Theme Generator.
- Or manually create it yourself
Choose the suitable option.
After that, download the WooCommerce plugin from WordPress Repository and save it locally on your computer.
Unzip it if you haven’t, then copy the copy the order-received.php file from /wp-content/plugins/woocommerce/templates/checkout/ folder.
Then, inside your newly created child theme folder, create a folder and name it to woocommerce. Then enter the woocommerce folder. Inside it, create another folder named checkout.
Then paste the order-received.php file inside the checkout folder. Open the order-received.php file and make the following modification:
change the following line:
echo esc_html($message);
into
echo $message;
Ensure that the order-received.php file is inside the /[your child theme]/woocommerce/checkout folder.
After that, zip your child theme and upload it into your WordPress website.
That’s it!